A step-by-step guide
This guide shows the practical steps to building good high-quality bike parking aligned with best practice. The approach is geared to make a property’s inhabitants and visitors happier, increase the property’s economic value, and help the community and sustainability.
This guide translates technical concepts into easy-to-follow steps for no-nonsense property managers, property owners, and other professionals who are not necessarily “bike people.” The material is intended to provide general guidance, subject to more specific local requirements and good judgment.
It’s based on generally accepted best practice, including the Association of Pedestrian and Bicycle and Professionals’ (APBP) Bicycle Parking Guidelines (2010), National Association of City Transportation Officials’ (NACTO) Urban Bikeway Design Guide (2014 and 2025 editions), and enacted municipal code as well as Design and Construction Standards (DCS) of the City of Boulder, Colorado.
This guide refers only to bike parking for short-term use, meaning, shopping and other visits that require parking for less than a few hours. Facilities that intend to accomodate people for longer stays, like places of employment, mult-dwelling housing, and transit centers, also need long-term parking. Long-term bicyle parking should use most of the same ideas here, but it adds locked doors and potentially some additional ameniti4es. Guidance for long-term parking is separate from this guide.
1. Size it
Determine the overall amount of ground area needed for bike parking.
The starting point for a small facility, like a corner store or a small shop, is a 6×7 foot rectangle. Those dimensions accommodate two “inverted U” racks side-by-side, with the racks spaced three feet apart, two feet from each rack to the side boundary, and six feet of length.
Facilities that host more people need more bicycle parking. Here is a sizing chart with guidelines for different sizes of retail, commercial, office, other services, multidwelling, and other community spaces.
The sizing requirements here are minimums. More space is better if possible, both in terms of more space to navigate the bike racks and more bike racks using more space.
2. Site it
Decide where to locate the bike parking area(s).
The bicycle parking area must be located in a place that is convenient and accessible for all users and bicycles of all sizes, shapes, and attachments such as front and rear racks, including long cargo bikes, e-bikes, and bicycles with unusual styles of frames.
The bicycle parking area must be:
- Within 50 ft of main building entrances, measured along a practical pedestrian path;
- Outside the building and adjacent to the sidewalk or public space, unless an equally convenient and visible indoor option is clearly signed;
- On the primary public‑access level, without requiring elevators or long ramps;
- In a place with good “passive surveillance”—for example, in front of storefront windows or along busy walkways, not hidden at the back of sites or in unlit corners;
- Located in convenient, highly visible, active, and well‑lighted areas; they are not hidden in remote corners; and
- Not blocking pedestrian movement, building entrances, curb ramps, transit stops, or accessible routes.
When looking for a good locaton, one tip is to consider is car parking that can be repurposed. Many facilities have more car parking than they need. Also, there is a trend towards cities and states eliminating minimum car parking requirements, so the target facility may have been designed with such requirements that no longer apply and hence has been freed up for bicycle parking.
A typical car parking space can hold 9-12 racks (accomodating 18-24 bikes) depending on the size. Front-row parking is the best.
Another tip is that in places with rain, snow, and/or bright sun, parking under a roof can be a much better experience. Consider options for that.
Another one: It is acceptable to break up the total area of bike parking until multiple spaces, provided each bike parking area retains minimum requirements per stall, which is essentially 6 feet in length with 2 feet on either side of the rack between boundaries.
Finally, when selecting the bicycle parking area site or site(s), consider the possibility of wanting or needing to expand the area in the future. Good bicycle parking is known to induce more bicyling.
3. Select and stand up the racks
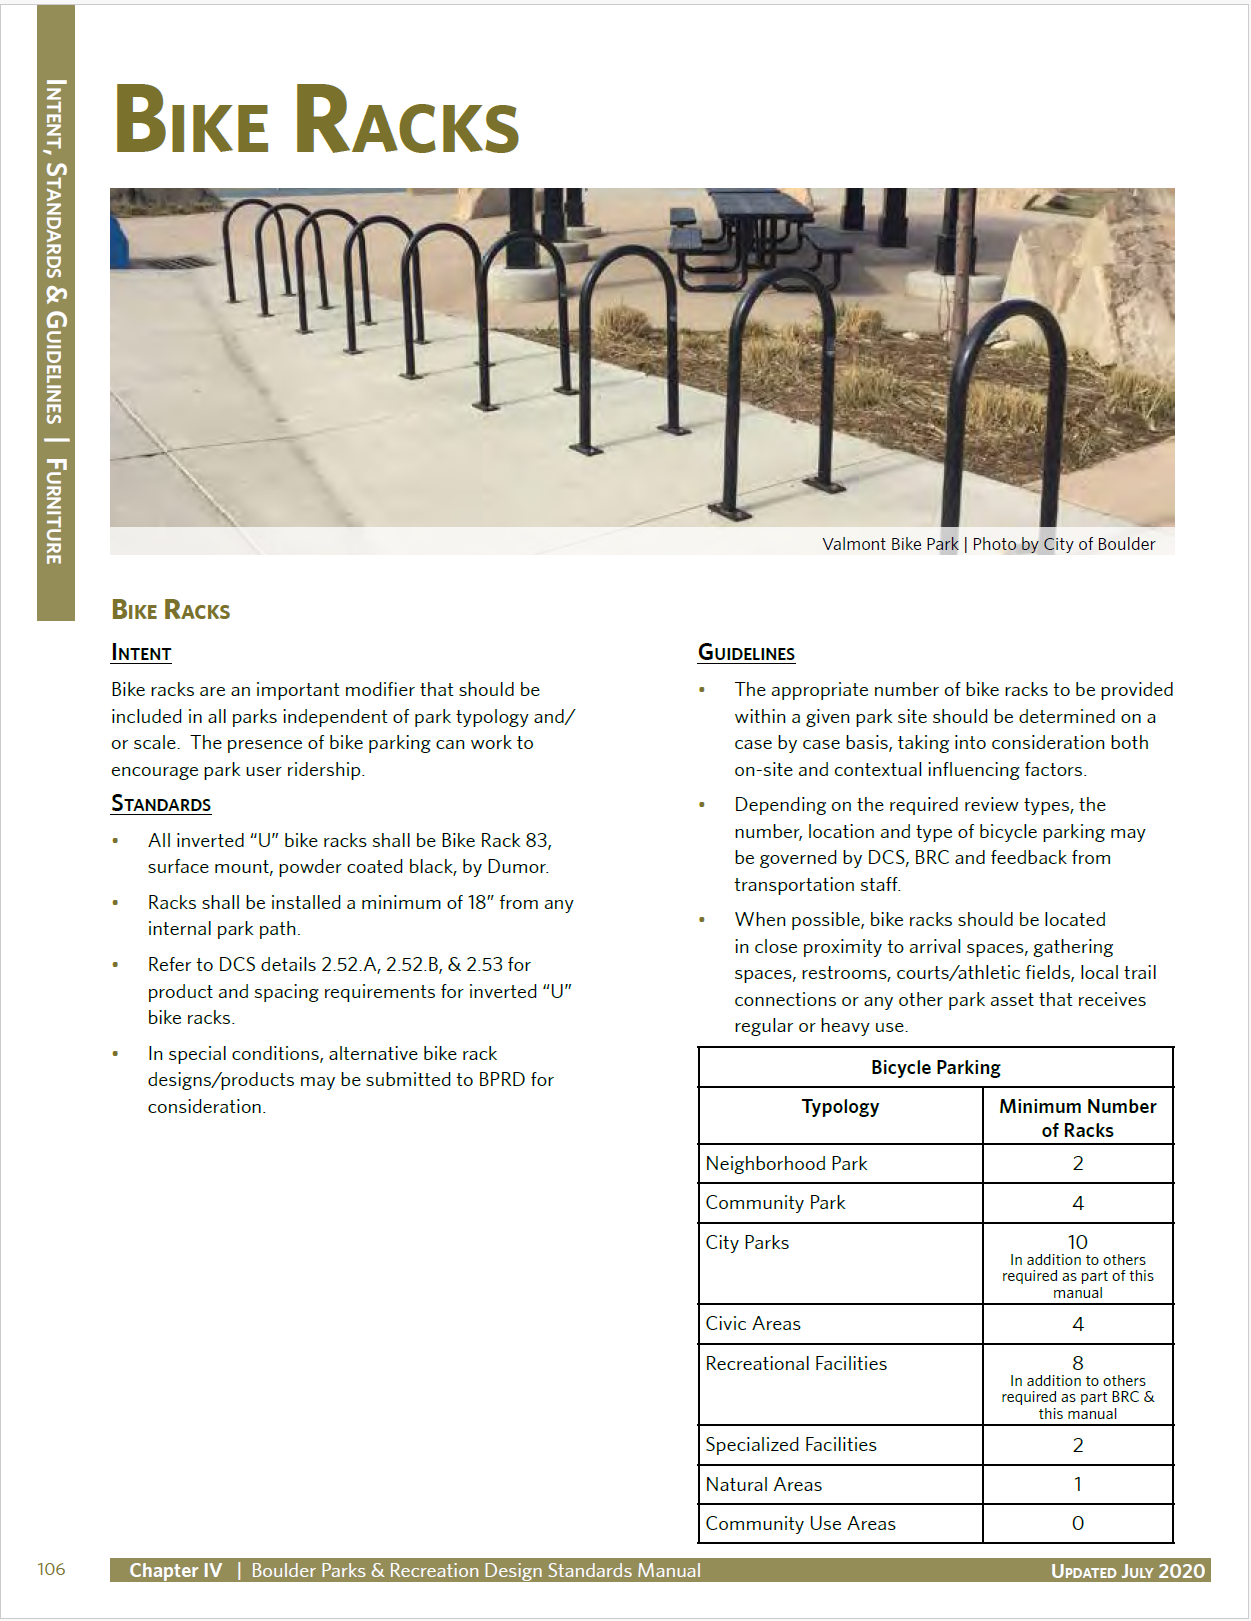
Select the bike racks, which should be the high-security, frame-lockable type—generally, an “inverted U” design bolted to the ground.
Select the racks. An acceptable bicycle rack is a high‑security rack that physically supports the bicycle frame (often called a “support‑type” rack). Such a high-security support-type rack or high-security frame-lockable rack is designed so that a user can secure their bicycle frame and at least one wheel to the rack with a personal u-lock while keeping the bike upright and stable.
In practice, this generally means an “inverted U” design, which is a rack in the shape of an upside‑down “U” made of steel tubing, anchored at both ends, generally bolted into concrete. An inverted U rack parks two bicycles, one on each side.
There are also many types of racks available and widely used that are unacceptable because they aren’t secure, don’t accomodate frame locking, or pose other critical problmes. Styles of unacceptable racks include “wheel-slot,” “wave-style,” “coathanger,” and “wheelbender” racks.
For a primer on racks that are acceptable vs unacceptable, see the Bicycle rack selection guide.
Inverted U racks are simple, widely available, and modestly priced. Manufacturers serving North America include Dero, Madrax, Saris Infrastructure, and Sportsworks, and RockyMounts. You can order directly from most of them and also through distributors and retailers like the Park Catalog, Belson Outdoors, Home Depot, BYO Playground, and Park Warehouse.
Pricing for inverted U racks depends on finish and durability. An acceptable racks in 2026 starts at around $150 and drops to $80-100 in bulk. Premium designs, like thicker tubing and stainless steel with maximum corrosion resisance, can be around $300-400.
Determine what materials are needed to securely anchor the rack to the ground. Considerations with the ground surface:
- Concrete: Secure the rack with concrete screws or anchor bolts into holes drilled in the concerete.
- Asphalt: Hardening is needed. Cut out a small section of asphalt and pour in a concrete footing. Alternatively use heavy-duty chemical anchors.
- Other: If the surface is bare ground or lacks a hard foundation such as concrete, the best option is generally to pour concrete.
Procure the racks and materials (and contractor if needed) and install the the system. Ensure there is sufficient spacing between the racks and parking area boundaries, most notably, at least 2 feet between racks and the boundary on any side of the rack.
4. Sign it
Visibly indicate the location of the rack and designate its use as exclusively for bicycle parking.
Use signs to help users locate the bicycle parking. If the bike parking area is not visible from the main entrance, include wayfinding signs there.
Similarly, use signs to communicate that the bicycle parking area is for the exclusive use of bicycles. Specify, that it is not intended for motorcycles or dockless scooters that are not making use of it as an anchor for locking.
If the bicycle parking area shares the same surface or grade with car parking, mark or paint the perimeter to show that it is dedicated to bicycle parking only. Better yet, create a physical barrier to physically protect that use. This could be done with permanent materials like curbs, bollards, or a fence. It could also be made of up more informal objects like planters, boulders, or railroad ties.
5. Make it sing
Make bicycle parking a first-class experience.
Now, zoom out from the formal criteria and specs and consider what would it would take to really roll out the welcome mat for bicycle users.
Here are some things that could help communicate to cyclists “we’re glad you’re here:”
- Give shelter: Provide a roof, especially in places with rain, snow, and/or bright sun (assuming the site is not already located under a roof).
- Make it beautiful: Paint it, decorate it, and make it artful and joyful. Just take care to avoid reducing the functionality.
- Keep it clean: Keep the space clear of debris and well-maintaned.
- Provide charging: Provide a way for users of e-bikes to charge their batteries.
- Provide storage lockers: Give users a place to temporarily store their belongings while visiting the facility.
- Give “rewards:” Give people who travel by bicycle–and use the facility’s space most efficiently–discounts, recognition, and other rewards.
Additionally, create a system to ensure the bike parking area stays in good repair and can be improved incrementally in a standardize, methodical way. One way to this is to create a bike parking policy for your facility. Here is a bicycle parking policy for the Parks and Recreation department in the City of Boulder.
This guide builds on established North American best practice for bicycle parking and urban bikeway design. Core dimensional standards and functional requirements are drawn primarily from APBP’s Bicycle Parking Guidelines (2010), NACTO’s Urban Bikeway Design Guide (2014 and 2025 editions, including its online “Bike and Scooter Parking” chapter), and the City of Boulder’s adopted code and Design and Construction Standards.
Additional recent guidance from NACTO and leading U.S. jurisdictions is used to ensure that recommendations are current with emerging practice, including micromobility and curb management. Where sources differ, this guide generally adopts the more protective or higher‑capacity standard.
